Posts Tagged With 'printable'

  • Oct
  • 11
  • 2013

{Freebie Friday} FREE DIY Eid Gift Tag Printables

{EID AL ADHA}

FREE  DIY Gift Tag Printables in assorted designs & colours!
*You may download this printable at the end of post*

This is a freebie Friday, because why not?!  The weekend is coming up, so its the perfect day to launch my FREE DIY PRINTABLES just in time for Eid. I’m sure many of you will be busy this weekend wrapping up gifts for Eid. Consider this my little Eid gift to you, fellow fans :)

To be honest, I wasn’t really planning to do printables this Eid, as my FREE EID printables are only an annual thing. But, as I was shopping one day to look for supplies for my personal Eid gifts, I fell in love with these paper strings and washi tapes! So I thought, since I’m doing it for myself, why don’t I share them with you?

Materials needed for this project:

1. This A4 (8×12″) printed template. Print as many as you wish
2. Ruler
3. Scissors and/or cutter
4. String or ribbon
5. Hole puncher

I love gift wrapping. I can unleash my creative side and go wild, there are so many options. Though, I only like to use kraft paper (brown paper) as the base, and then decorate it with different coloured strings, ribbons, washi tapes, flowers, doilies, pom poms etc…ahh your imagination runs wild. A quick search on Pinterest will get you quite excited about gift wrapping.
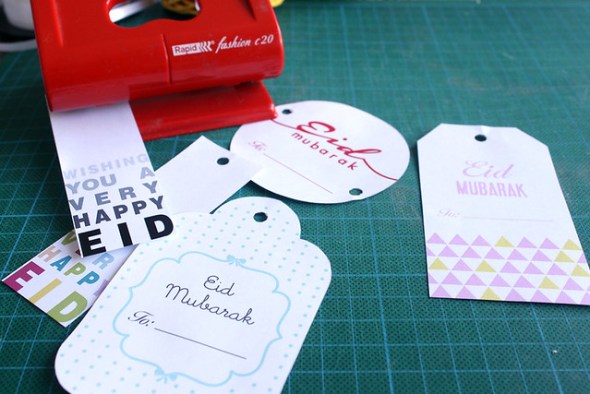
Once you’ve cut them out, use a hole puncher and punch some holes as shown.

Now you’re ready to wrap, decorate and thread your gift tags. Its superrrrr simple! And go crazy wrapping, you can find lots of ideas on Pinterest if you do a search for ‘Gift Wrapping’ and lots of inspirations will come up. There are so many ways you can wrap a present, so mix and match!

This one is for the males! Don’t be scared to use black wrapping paper, often, black makes a present look outstanding and unique, especially when combined with one of this black and white gift tag ;)

This gift tag was inspired by washi tape! I absolutely love them. This particular one, was inspired by the ‘Coloured airmail’ washi tape. I love the vibrancy of the colours in it!

And of course, teal is my favourite new colour. Inspired by the washi tape (sitting above it).


  • Jul
  • 25
  • 2013

Freebie #3 – Printable DIY Eid Bunting Flags

Our third week FREE DIY Printable is for the home!
*You may download this printable at the end of post* 
 

Freebie #1 – Printable DIY Eid Bunting Flags


What is a celebration without a welcome banner right? So for week #3, we have a bunting flag template that you can just simply print, cut and decorate!
Materials needed for this project:
1. This printable template
2. A4/8×12” White paper (200gsm/110 lb +)
3. Ruler
4. Cutter and scissors
5. Hole punch
6. Ribbon or string
Cut the flag template using a cutter/scissors and ruler.
Don’t be lazy like me and cut all 6 pages together in one go! Thank God I got them all right- be sure to align the pages properly if you’re using this lazy method!
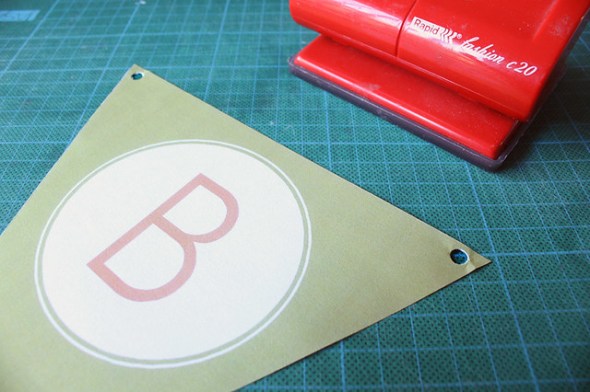
Use a hole puncher to make 2 holes on each flag.
Again, the lazy me…punching all the holes together. Woohoo I got it right the first go! (if you stuff up, you start again from scratch!)

Arrange them to make “EID MUBARAK”.

Cut your string to the desired length (measure where you want to hang them first). Thread the string/ribbon through. The first letter, you need to put the string from the top (see pic above).

And then just add all the letters, making sure the string/ribbon is behind the flag so you cant see it.

And now decorate! I chose to hang them at my old unused fireplace as mantel piece decoration. Absolutely love it! And the best part is, the colors go extremely well with my living room decor!


  • Jul
  • 12
  • 2013

Freebie #1 – Printable DIY Eid Paper Lantern Template

As promised, this is our first freebie for this Ramadan!

*You may download this printable at the end of post*


Freebie #1 – Printable DIY Eid Mini Triangular Paper Lantern (Template)


In Sha Allah I will be releasing a Party Package and the theme will be focused around ‘CONFETTI! Thats right, confetti is all about celebration; and for Muslims, Eid marks one of our biggest celebrations.

Since having kids (and living abroad), I try to make Eid as joyous as it can be. Over the last couple of years, I have made homemade Eid desserts (cupcakes, almond cookies, peanut cookies) and cooked traditional Malaysian Eid Food (rendang, lontong) for our little family- at the time, my first was only a baby/toddler…so I didn’t really bother much with decoration. However, this year will be her 3rd year celebrating Eid (in fact, she turns 3 today Mashallah!). She can cut, paste and gets excited over little things, Alhamdulillah…so I have decided to decorate the house as much as my enery allows me It is definitely a challenge, running a small business whilst having 2 kids under 3 and another on the way In Sha Allah.

And thanks to our Facebook fans who have voted, the winning colour for our Confetti theme will be ‘Lime and Yellow‘. I have also complemented it with a surprise colour;  orange – for a bit of fun and to bring it all to life.

So please bookmark this blog and like us on Facebook for more updates throughout the month regarding our free printable party downloads. For the next 3 weeks, I will be giving away printable bunting flags, cupcake toppers, food tags and gift tags and hopefully a few other surprises (if I get the time!)

As much as I enjoyed creating & crafting these paper lanterns, I also hope that these little printables will be of great use to you.  May it bring happiness and joy for your Eid celebrations with your loved ones! If you would like us to continue with more freebies in coming Ramadans, please share this blog post on your Facebook, Twitter, Pinterest (or any social media)- we’d really appreciate that, thanks folks!

To view last years free printables, please click Printable Eid Card and Printable Straw Flags/Cupcake Toppers.

In the meantime, please enjoy my step by step on how to make a Triangular Paper Lantern. And if you do use our printables, I would looooove to see some photos of it. You are welcome to email them to me or post them on my Facebook page.

These are the materials needed to make this DIY Paper Lantern Eid Project.

You need:

1. This printable template
2. White cardstock (preferably thick)
3. Ruler
4. Cutter (or scissors)
5. Double sided tape (or glue)
6. Hole punch
7. Ribbon or string

1. You will need to download this printable PDF (found at the bottom of this post) and using a colour printer, print as many as you like! This template can be printed on an A4 (8×12″) paper. The constructed size of lantern if printed on the suggested paper will be 17cm/6.6″ long and 8cm/3″ wide.

2. Using a cutter or scissors (I find using a cutter/knife easier), cut out the template carefully. Please cut along the SOLID lines and SCORE/FOLD on dotted lines.

3. Use a hole puncher to make 2 holes, as marked on template.

4. Put a ribbon/string through the holes but do not tie them as yet. Make sure when you insert the string, that it goes in the hole from the top (where the design is printed)

Grab the feeded string and bring it from behind to front (as show above). Make sure each side is equal in length.

5. Score lightly and fold along the dotted lines

Put your double sided tape or glue. I used double sided tape as I found it to be easier when putting it together.

Though, your child will not agree and think glue is fun!

6. Now carefully construct your paper lantern, starting from the top left and make your way across, and then below (clockwise)

This is what underneath should look like. Make sure you do not overlap on the string!

Ta-da!

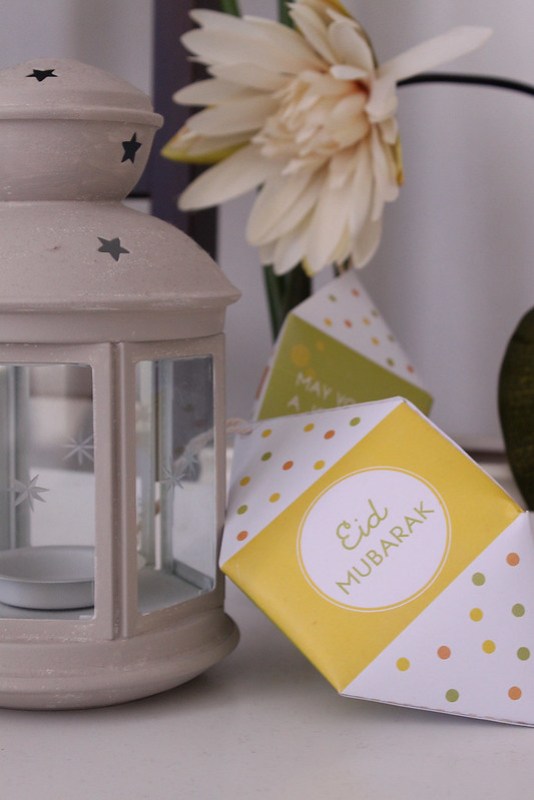
Now that you have constructed your paper lantern, you may decorate as you wish! I hung them across the arch in our living room just as we enter the house.

Please click the Download button below and you will see a PDF document with 2 pages. Page 1 of 2 is intructions and 2 of 2 is the template.


  • Oct
  • 29
  • 2012

{before + after} DIY quatrefoil table stencil

This is our revamped side table with a quatrefoil design. Lately I’ve been into contemporary Moroccan latticework patterns. They are absolutely pretty!  I’ll show a step by step on how to stencil this table. There are a couple of ways to do it, either paint it with your bare fingers (using a template or use a sticker stencil) I’ll show you the stencil way. First, get yourself an old table. We picked this up from an ad on Gumtree for $15.

I measured the diameter of the table and whipped up the patterns on illustrator. Feel free to download the pattern template here. I made it available in a PDF version so the vector works remain if you wish to resize it.

Then print it out onto sticker paper and using a stanley knife or scissors, carefully cut out the stencil template.

Give the table a good sand thoroughly.

Paint the base colour, I chose a light grey. Give it two coats.

Once dried, apply the sticker stencil. Press to make sure they are no bumps. And finally spray it white, two coats again. Leave it to dry for a day before removing the stencil.

Once you remove the stencil, sand the edges using a fine sand paper to enhance the edges and also to give it a rustic look.

And now we’re done!

Total cost of project:

Side table $15
Spray paint $3
Sticker paper $2

Final total:$20. An absolute bargain!

It makes for such a pretty indoor or even outdoor side table.


  • Oct
  • 23
  • 2012

{party printable} customisable love heart tags

You can use these for party favors such as gift tags, food tags, note tags etc. You can even print them out on a sticky paper and make cute stickers. Your imagination is endless!

Each tag measures approx 4″ x 4″(10x10cm) and I can customise up to 6 different slogans.

Please click the image to head over to my Etsy store and purchase this party printable for only $4!

Related Posts Plugin for WordPress, Blogger...


Copyright © inmystudio by Iva Izman, 2009 - 2012. All Rights Reserved.