I have always admired her DIY creations, and when this one came up, I said to myself I have to feature this on my blog! This party was styled by my friend Elcin from Jellybean in My Closet for her dear sister. Delectable mouth watering desserts were made by Eda and photography by Sibella .
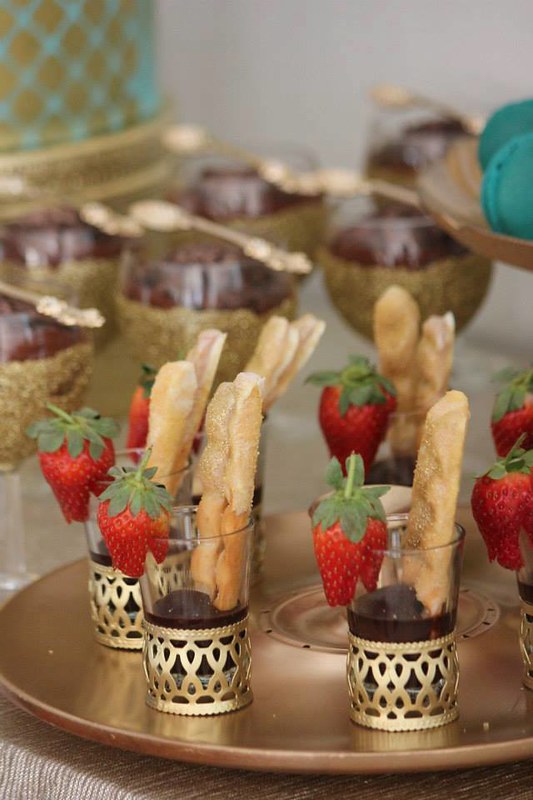
She has named her event Gold 4 Glamour. The colours Elcin has chosen for this event are simply glamorous, vibrant and exciting! What I am impressed most about this party styling is that Elcin pretty much DIYed most of the items on the dessert table herself, from things that she found from second hand shops such as a napkin ring- she turned them into dessert cups. Such an innovative idea!

Since Eid is coming up, I thought I’d let her share some of her DIY tips and How To’s. Below are her 5 top tips on creating a successful DIY Tea Party.
1. Keep it simple.
When it comes to party décor, you’re either making a statement piece (wall art, centrepiece etc) or multiples of something (drink bottles, hanging décor etc). For this reason, I recommend keeping the process of making it simple. If there is an easier way of doing something, go for it!
2. Google!
Whenever I have a DIY idea, I get onto Google or Pinterest, because 9 times out of 10, somebody else has already thought of the same idea. You can pick up some great tips and things to avoid when attempting your DIY.
3. Think outside the square.
Look at pieces from a different angle. When I saw the napkin rings & the candle holder at the op shop, I fell in love. I knew I didn’t need them for the purpose they’ve been made but began to think of how else I could use them. The napkin rings made a fantastic dessert cup and the candle holder a pretty vase!
4. Plan it.
Once you have done step 1-3, now you can plan it! Choose your theme. Once I have a theme in mind, I look around my house to see what items will work with my theme. You’ll be surprised as to what you have! Time is imporant. If you are planning an event 3 months down the track, plan for it 3 months ahead. The planning and preparing won’t take you 3 months, (the gold party prep took no more than 1 week) but at least you will be giving yourself plenty of time for shopping and creating to avoid last minute stress.
5. Spend less.
You don’t need to spend big. It’s amazing how much money you can save by making your own party ware. All of my party ware was purchased from op shops which I simply spray painted gold.
Below are her some of her DIY How to’s

Cake Stand
You will need: A glass plate, a glass that is able to hold the plate, spray paint & super glue.
I’ve seen these made online using porcelain plates. Which would mean you would either need to leave the upside of the plate unpainted or risk the spray paint chipping during use/washing. I thought it would be much easier to use a glass plate, meaning I’d only need to spray paint the bottom of the plate and the colour would show through the top. Once both the glass and plate have been sprayed and dried, use a strong super glue to join the two. Place some weight on top and allow the glue to set and wa-laa, you have yourself a cake stand in the colour of your choice! I made 4 glass cake stands for the day which cost approximately $25! Candle holders are also great to use for this in place of a glass.

Napkin Rings
I found 8 of these gorgeous napkin rings at an op shop and wanted to use them on the table to serve food. I was first going to make paper cones to sit inside, but then a friend suggested I sit shot glasses inside. I sprayed the rings gold, and found perfectly fitting glasses – too easy!

Vase
This is actually a tall candle holder found in an op shop for a few dollars. I simply spray painted the black metal that sits inside the glass.


Event stylist: Jellybean in my closet
Event Photography: Sibella
Cake/desserts: Eda


